How To Start a Shopify Online Store in 2023: A Comprehensive Guide

Table Of Content
- Plan Your Store Without Opening Your Computer
- Choose Your Store's Name
- Create A Shopify Account
- Select & Customize Your Shopify Theme
- Add Products To Your Store
- Create Your Collections
- Set Up Payments And Shipping
- Optimize for SEO
- Keyword Research
- On-Page Optimization
- High-Quality Content
- Mobile-Friendly Design
- Page Speed
- User Experience (UX)
- Technical SEO
- Reviews and Testimonials
- Secure Website (SSL)
- Social Media Integration
- Local SEO (If Applicable)
- Backlinks
- Shopify SEO Apps
- Regular Monitoring and Adjustments
- Launch Your Store
- Market Your Store
- Analyze and Optimize
- Conclusion
Shopify is one of the most popular and powerful platforms for creating and running an online store. Whether you want to sell physical products, digital products, services, or subscriptions, Shopify can help you launch and grow your ecommerce business with ease.
In this guide, we will show you how to start a Shopify online store in 2023, step by step. We will cover everything from planning your store, choosing a name, creating an account, selecting and customizing a theme, adding products and collections, setting up payments and shipping, and marketing your store.
By the end of this guide, you will have a fully functional and professional-looking online store that is ready to accept orders and make sales. Let's get started!
1: Plan Your Store Without Opening Your Computer
Before you dive into the technical aspects of setting up your Shopify store, you need to do some planning and research. This will help you define your goals, identify your target market, analyze your competitors, and choose your niche.
Some of the questions you should ask yourself are:
- What are you going to sell? What problem are you solving for your customers? What value are you providing them?
- Who are your ideal customers? What are their demographics, psychographics, pain points, needs, and wants? How can you reach them and communicate with them?
- Who are your main competitors? What are their strengths and weaknesses? How can you differentiate yourself from them?
- What is your unique selling proposition (USP)? What makes your products or services better or different from others in the market?
- How are you going to price your products or services? What is your profit margin? How will you cover your costs and expenses?
- How are you going to promote your store? What marketing channels and strategies will you use? How will you measure your results?
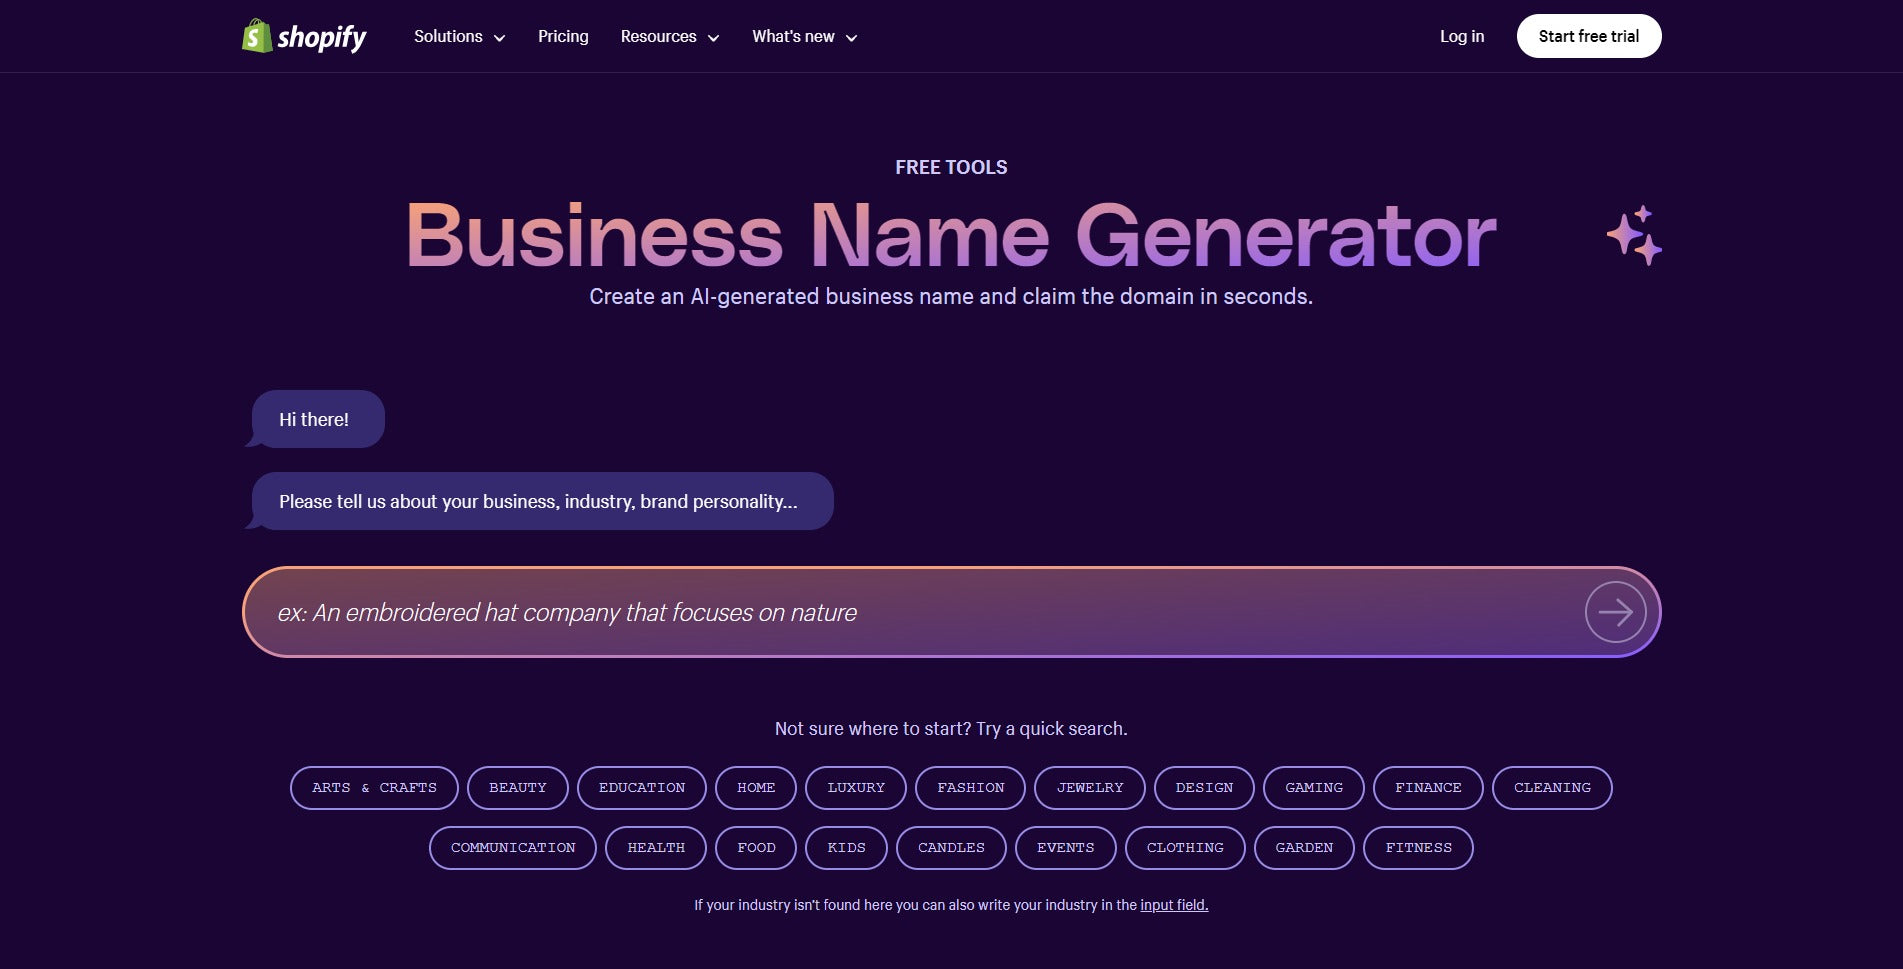
These are some of the questions that will help you plan your store and create a business plan. You can use tools like Google Trends, Keyword Planner, Facebook Audience Network, Shopify Compass, and Shopify Business Name Generator to help you with your research.
2: Choose Your Store's Name
Once you have a clear idea of what you are going to sell and who you are going to sell it to, you need to choose a name for your store. Your store's name should reflect your brand identity and values, as well as be catchy, memorable, and easy to spell and pronounce.
Some tips for choosing a good store name are:
- Use keywords that describe your products or niche
- Avoid using numbers, hyphens, or misspellings
- Keep it short and simple
- Check the availability of the domain name and social media handles
- Make sure it is not trademarked or already taken by another business
You can use tools like [Shopify Domain Name Generator] - this tool is FREE, [Namechk], [Trademarkia], and [USPTO] to help you with finding and registering a domain name and checking for trademark issues.
HaloThemes Exclusive Offer for New Shopify Merchants
3: Create A Shopify Account
After you have chosen a name for your store, you need to create a Shopify account. This is where you will manage all aspects of your online store, such as adding products, setting up payments, designing your website, tracking orders, and more.
To create a Shopify account, follow these steps:
Sell Online With Shopify
Trusted by over 1,000,000 businesses worldwide
- Sign up for a Shopify account: Visit the Shopify website and click on the "Get Started" button. Enter your email address, create a password, and choose a store name.

- Provide Store Details: After signing up, Shopify will ask you a few questions about the type of products you want to sell and your current revenue status. Answer these questions to help Shopify personalize your experience.

- Set up your domain: Shopify provides a free myshopify.com domain for your store

- Add Your Store's Address: Enter the address where you will be operating your store. This information is required for tax calculations and shipping settings.
Congratulations! You have just created your Shopify account. You can now start building your online store.
4: Select & Customize Your Shopify Theme
One of the first things you need to do after creating your Shopify account is to choose a theme for your online store. A theme is a pre-designed template that determines how your website looks and functions.
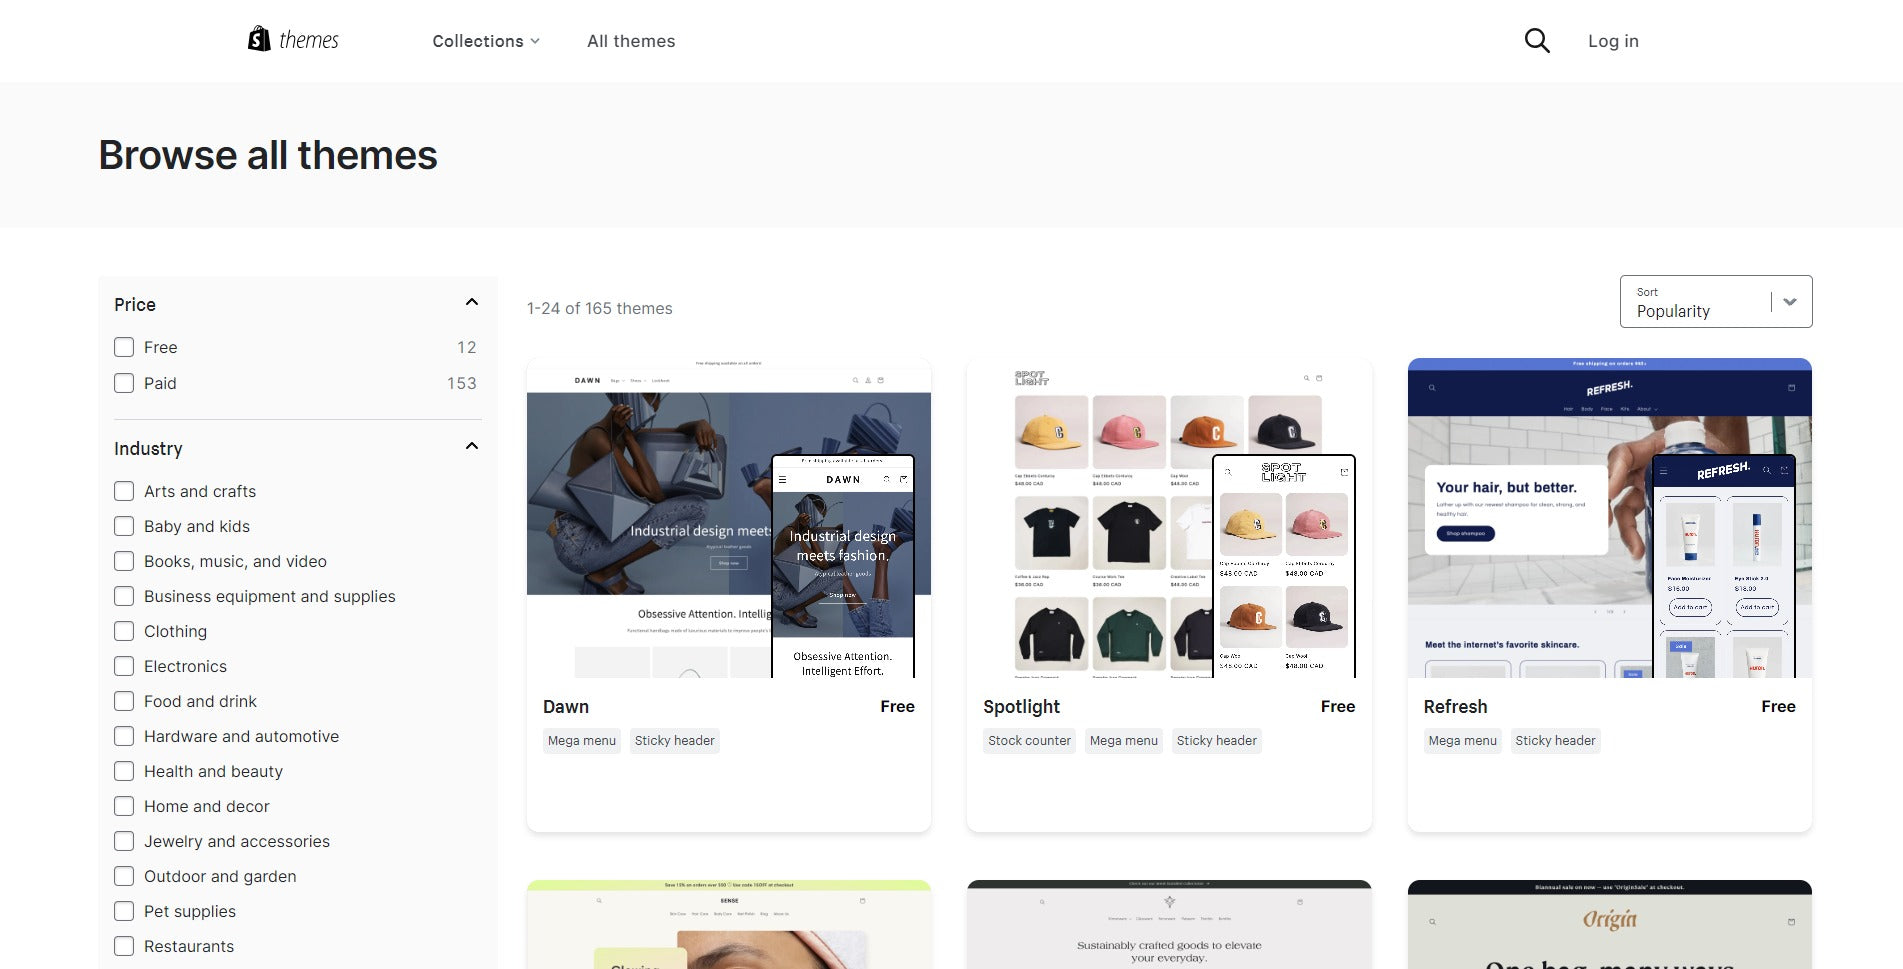
Shopify offers hundreds of free and paid themes that cater to different industries, styles, and preferences. You can browse through the available themes in the Shopify Theme Store or use the filters to narrow down your options.
2023's Best Selling eCommerce Websites Templates
Ella is #1 best selling Shopify Theme of all time on Envato market
Some of the factors you should consider when choosing a theme are:
- The layout and features of the theme
- The responsiveness and speed of the theme
- The compatibility with different devices and browsers
- The customization options and flexibility of the theme
- The reviews and ratings of the theme
- The support and documentation of the theme
Once you have found a theme that suits your needs, you can preview it, add it to your store, and customize it.
To customize your theme, go to the "Online Store" section in your Shopify dashboard and click on the "Customize" button.
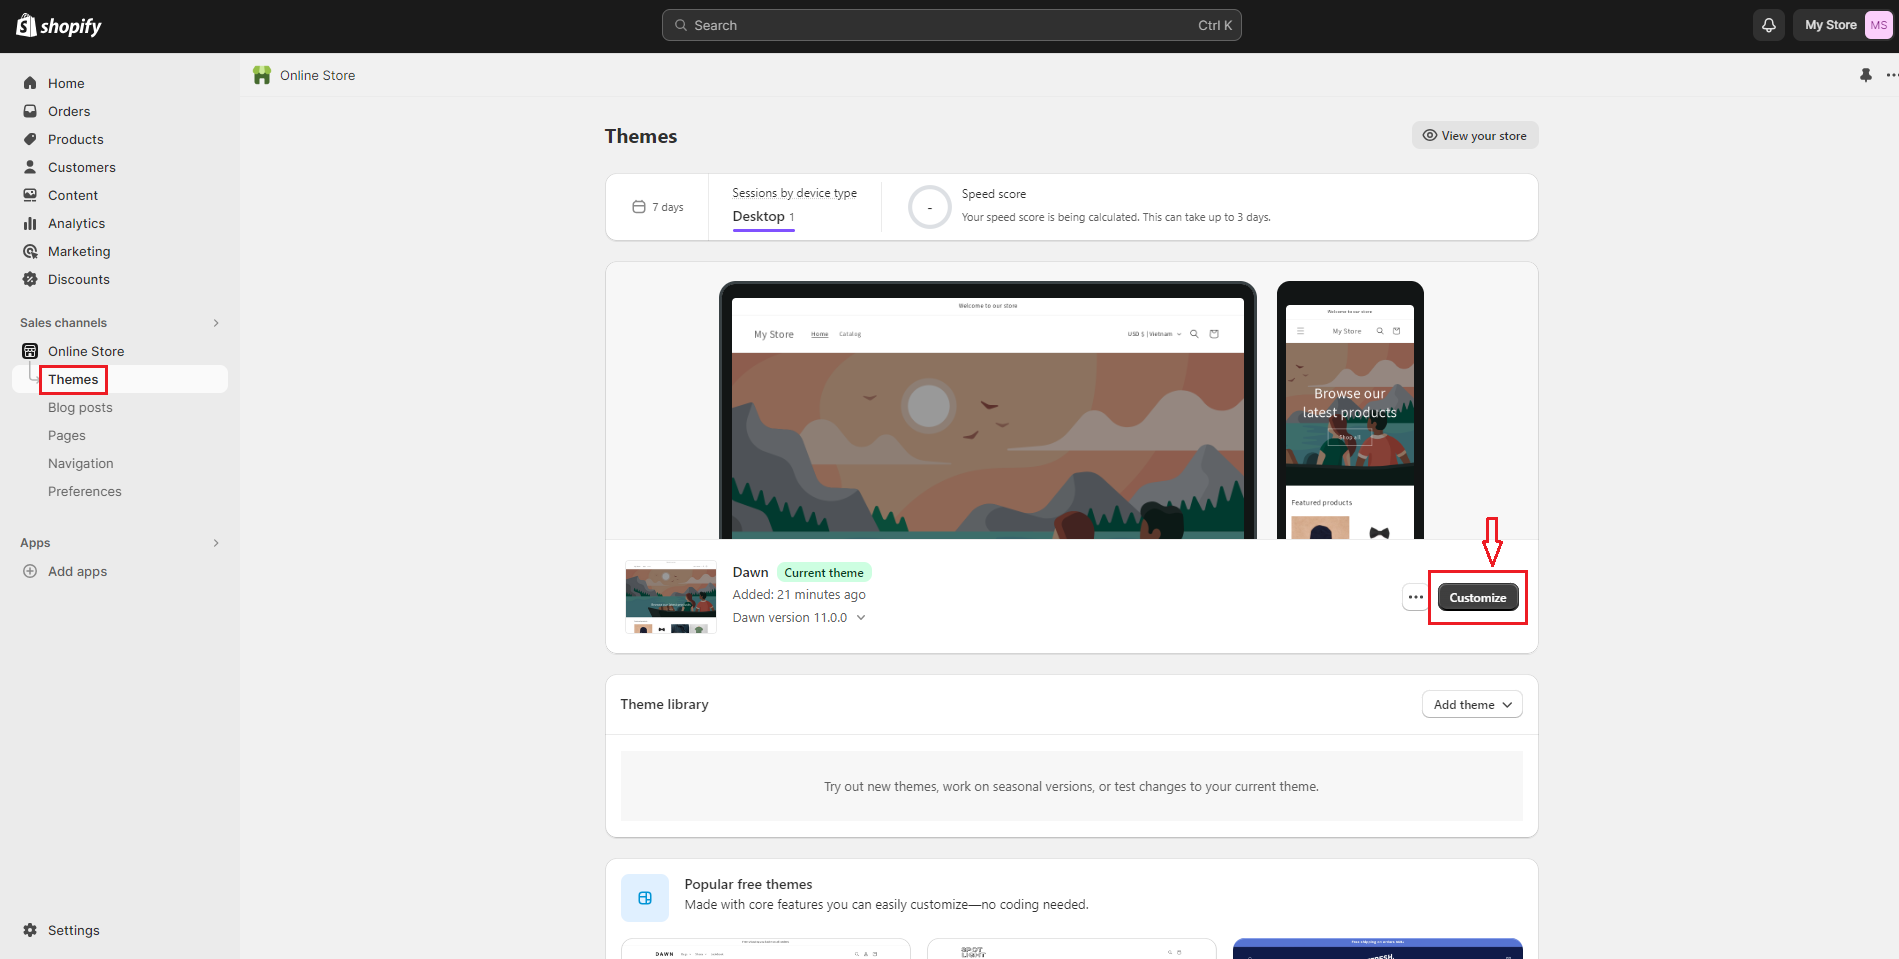
You will be taken to the theme editor, where you can make changes to your theme's settings, sections, and content. You can also use sections and blocks to arrange your store's content, allowing you to easily personalize your online store.
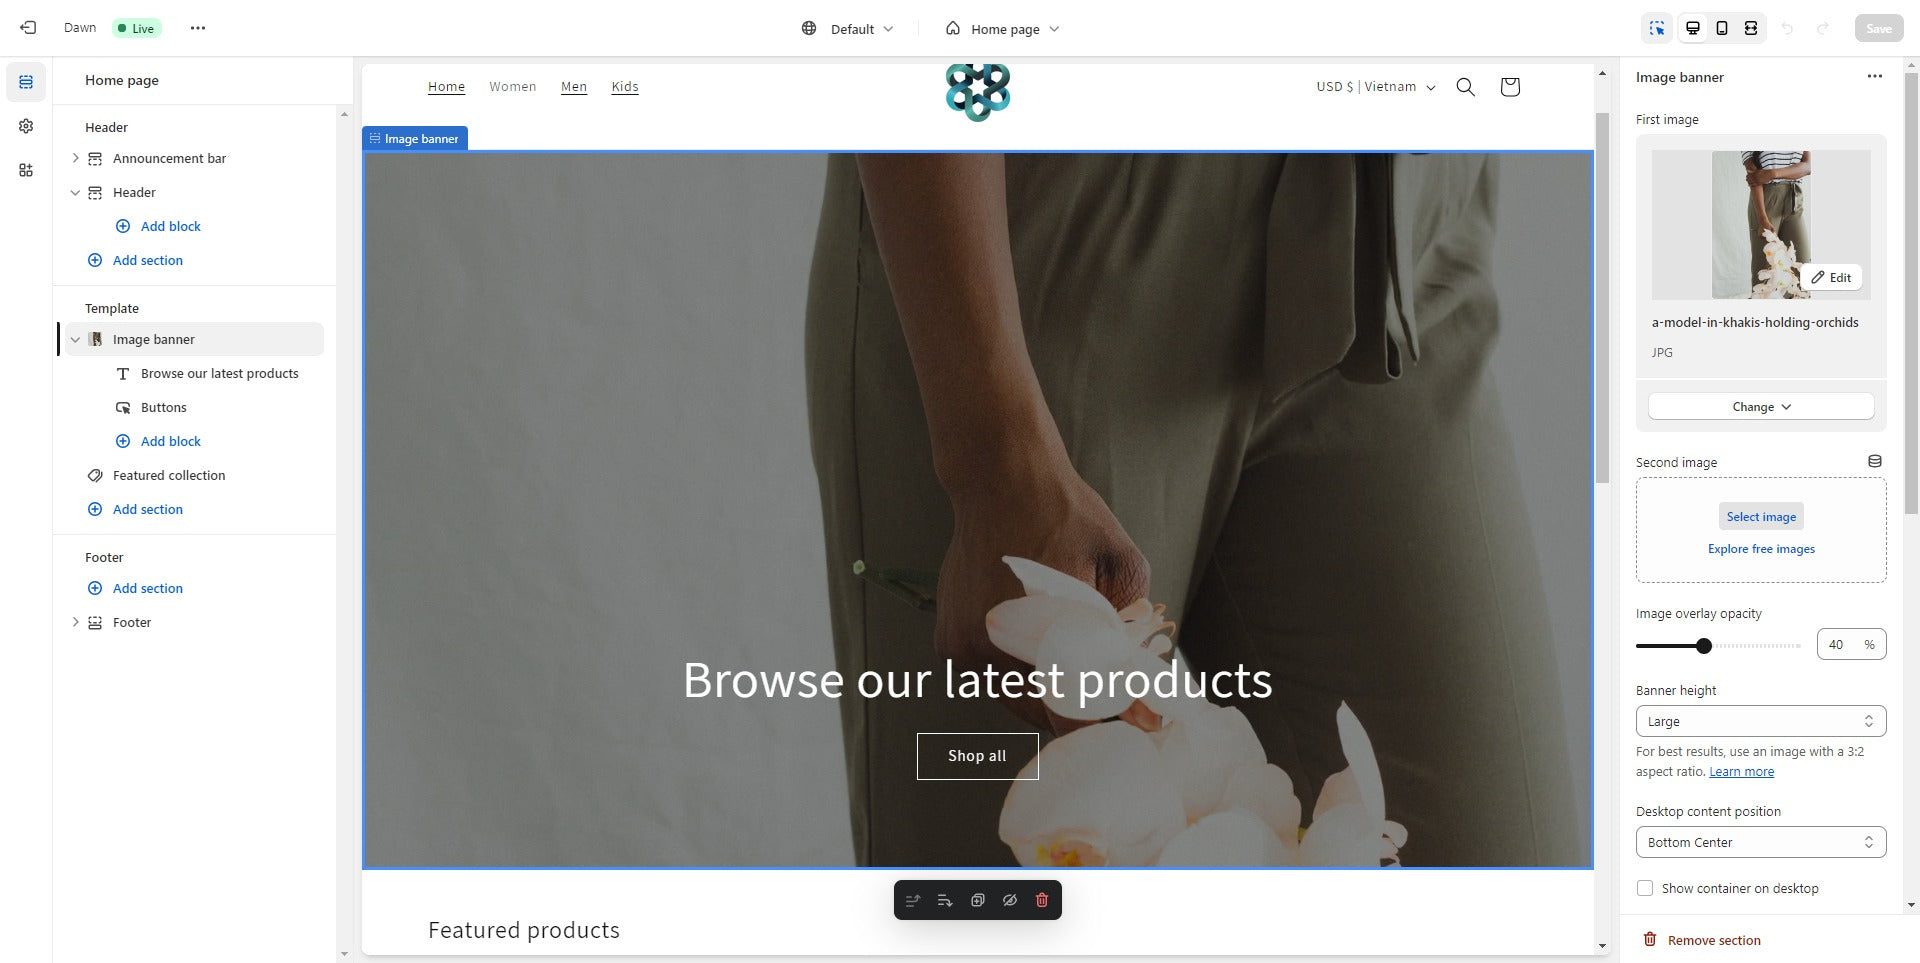
Some of the things you can customize are:
- The logo, favicon, and colors of your store
- The fonts, headings, and text of your store
- The menus, links, and navigation of your store
- The images, videos, and slideshows of your store
- The products, collections, and filters of your store
- The banners, testimonials, and social media icons of your store
- The footer, newsletter, and contact form of your store
You can preview your changes on different devices and screen sizes by using the icons at the top of the theme editor. You can also undo or redo your changes by using the buttons at the bottom of the theme editor.
When you are happy with your customization, click on the "Save" button to apply them to your store.
5: Add Products To Your Store
The next step is to add products to your store. Products are the items or services that you sell on your online store. You can add as many products as you want, but you should make sure that they are relevant to your niche and target market.
To add a product to your store, follow these steps:
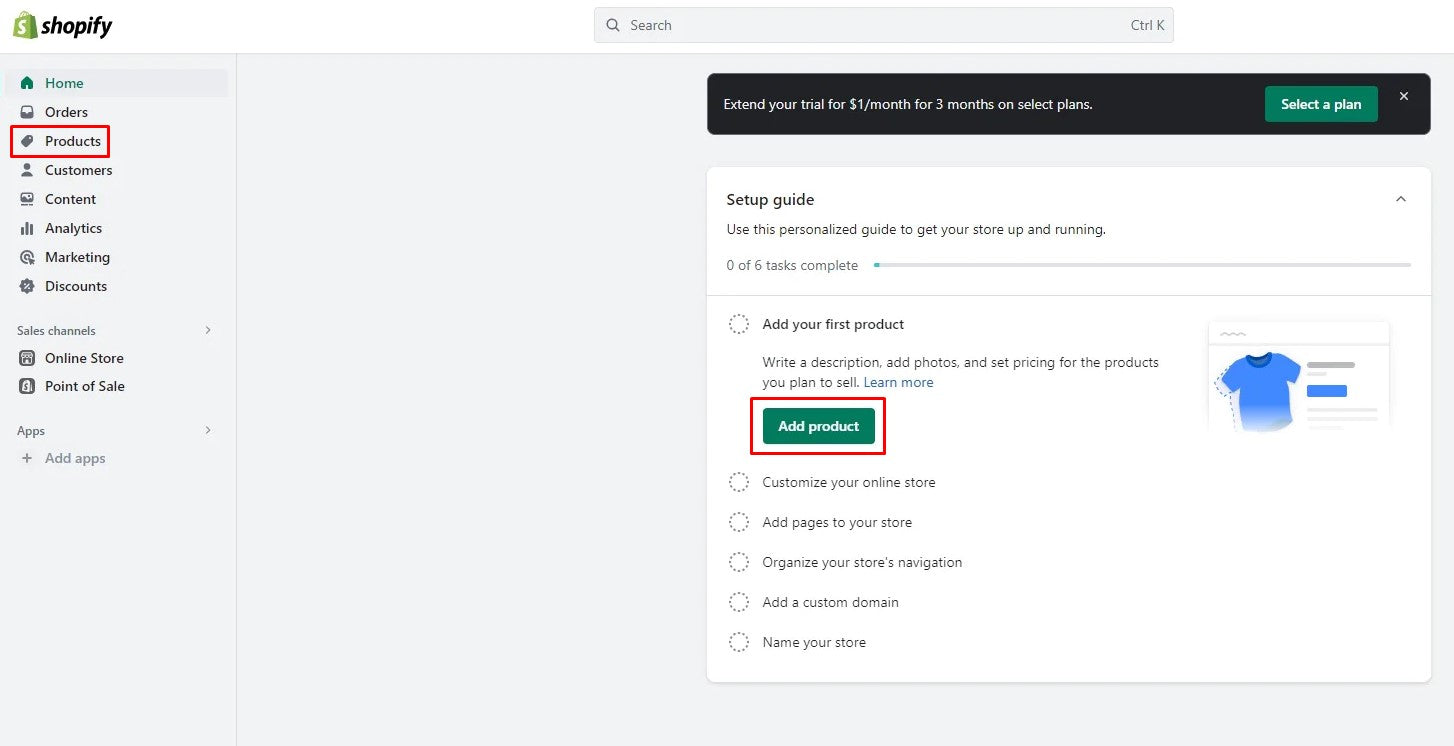
- Go to the "Products" section in your Shopify dashboard and click on the "Add product" button.
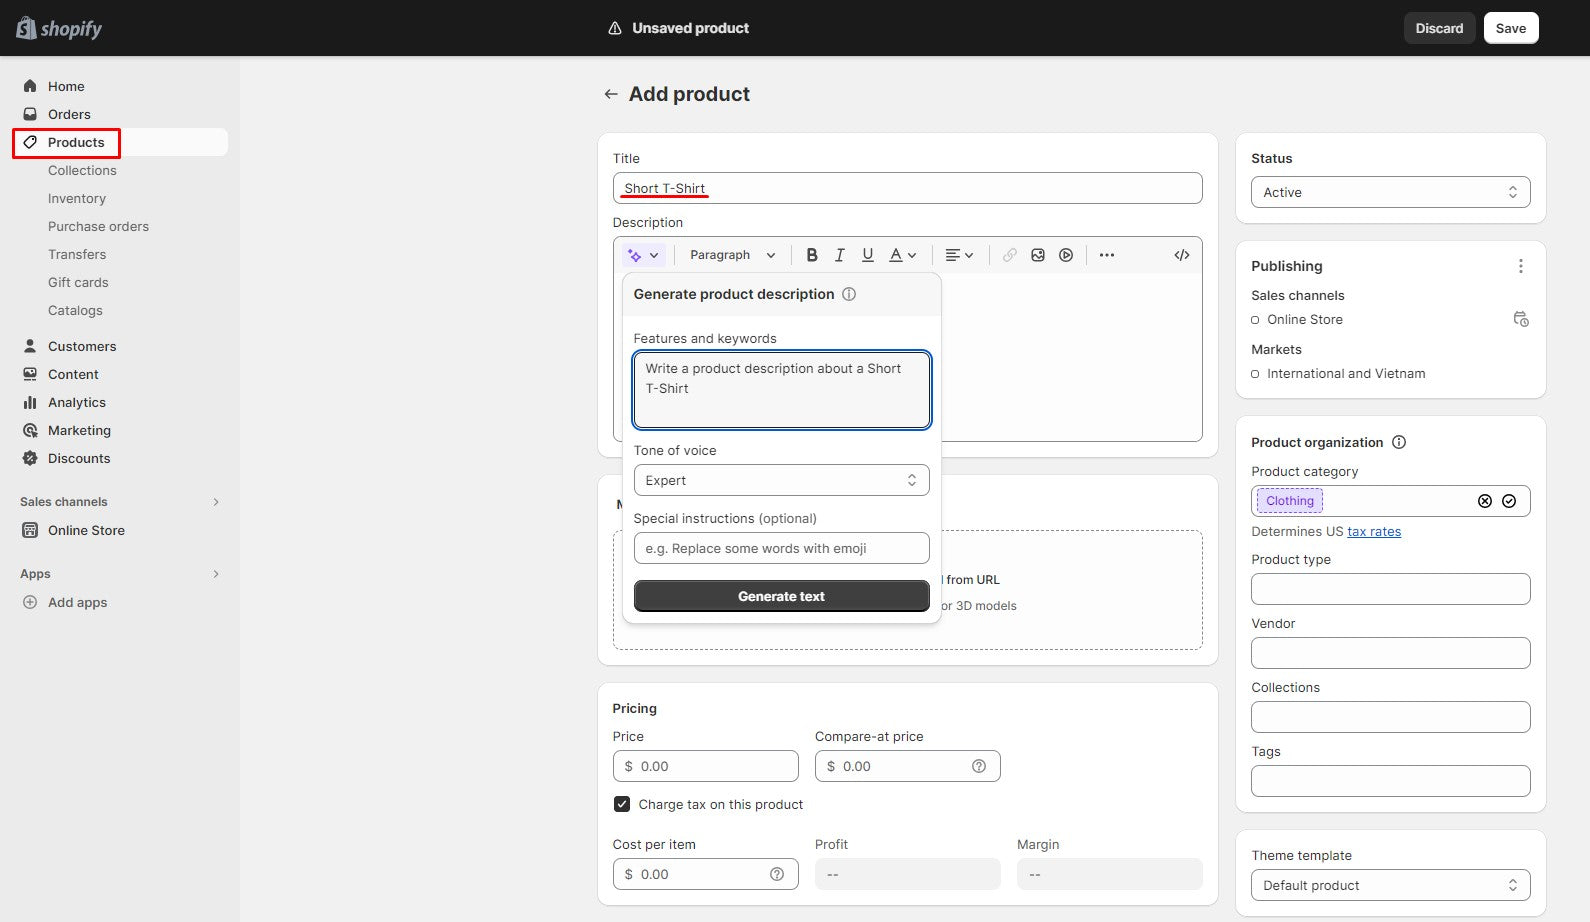
- Enter the title, description, price, and inventory details of your product. You can also add variants, options, and SKU numbers if your product has different sizes, colors, or other variations.
- Upload images of your product. You can drag and drop them or use the "Add image" button. You can also edit, crop, or rotate them using the built-in image editor.
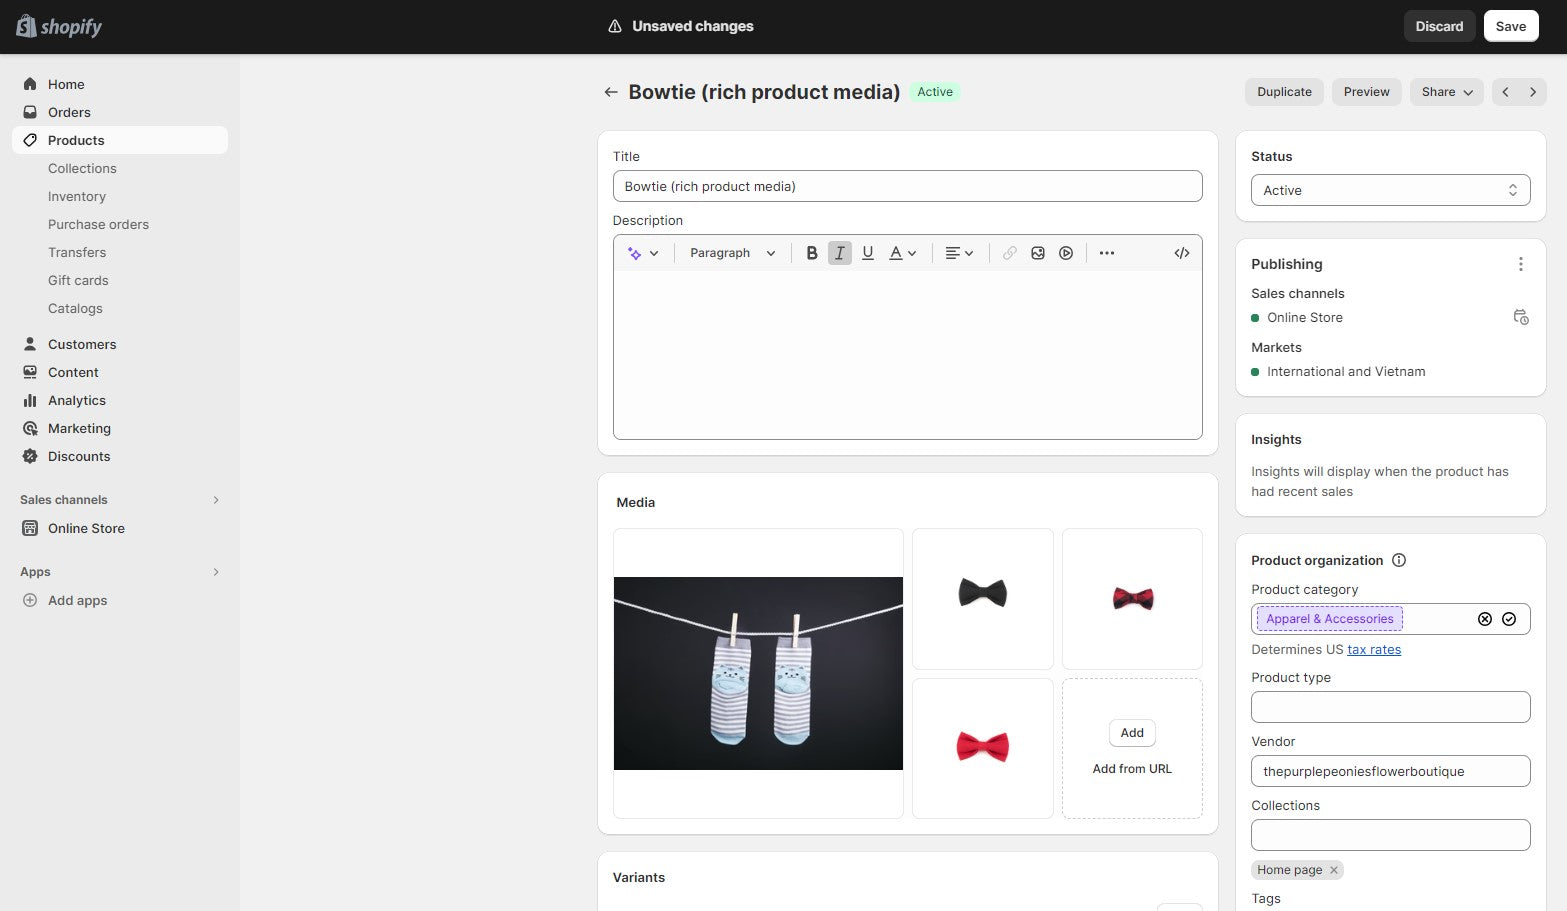
- Add tags and collections to your product. Tags are keywords that help customers find your product. Collections are groups of products that share a common theme or category.
- Set up shipping and taxes for your product. You can choose whether your product requires shipping or not, and enter the weight and dimensions of your product. You can also select which countries or regions you want to ship to and apply taxes based on your location.
- Click on the "Save" button to add your product to your store.
You can repeat these steps for each product you want to add to your store. You can also import products from other platforms or sources using CSV files or third-party apps.
6: Create Your Collections
Collections are groups of products that share a common theme or category. They help you organize your products and make it easier for customers to browse and find what they are looking for.
You can create two types of collections: manual or automated. Manual collections allow you to manually select which products you want to include in a collection. Automated collections allow you to set rules that automatically include or exclude products based on certain criteria.
To create a collection, follow these steps:
- Go to the "Products" section in your Shopify dashboard and click on the "Collections" tab.
- Click on the "Create collection" button.
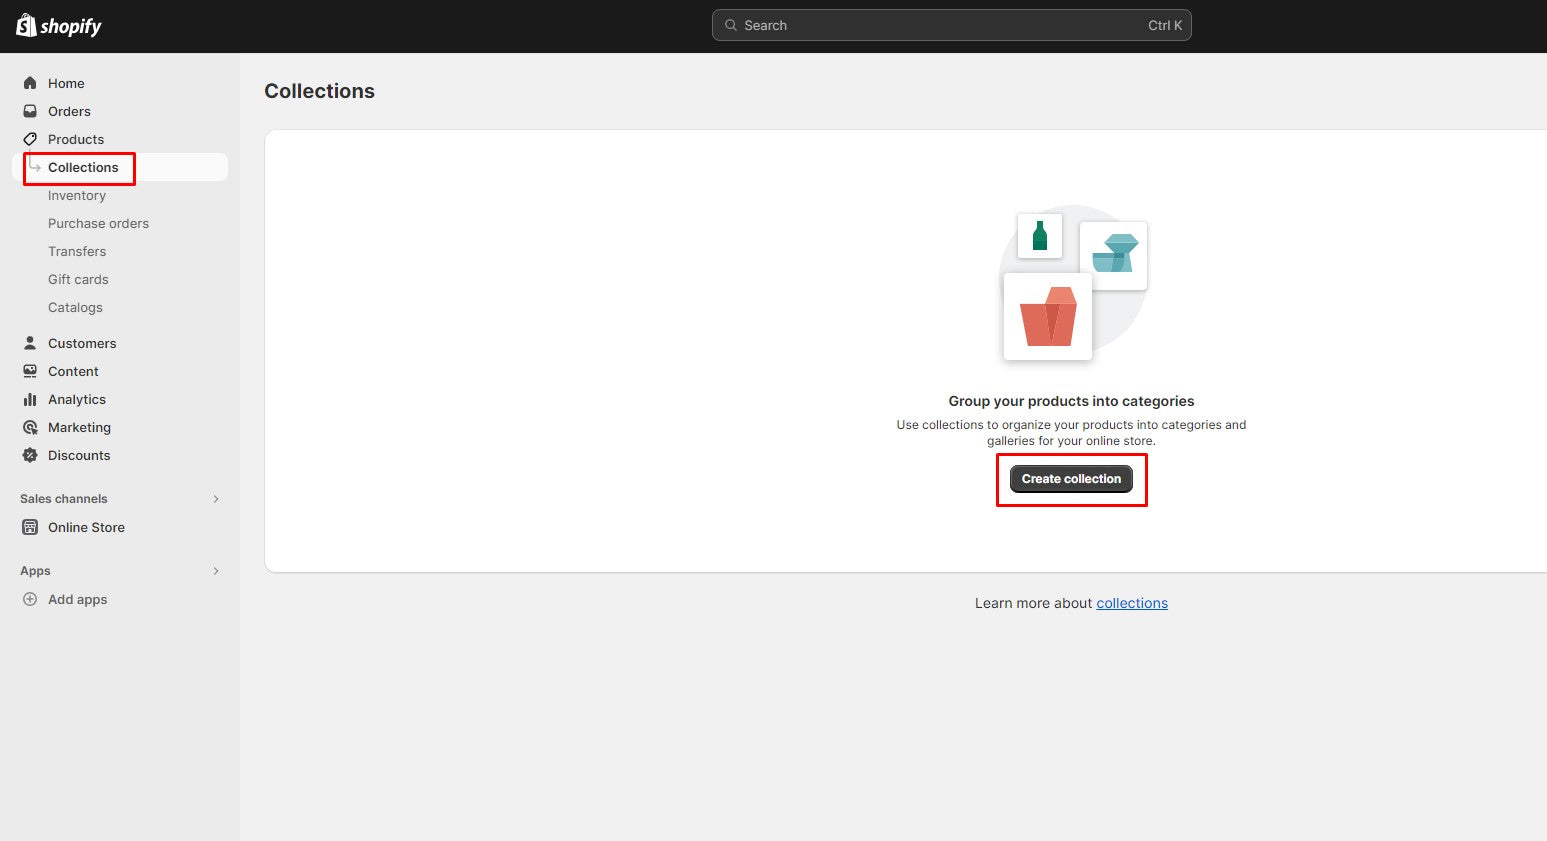
- Enter a title and description for your collection. You can also upload an image for your collection.
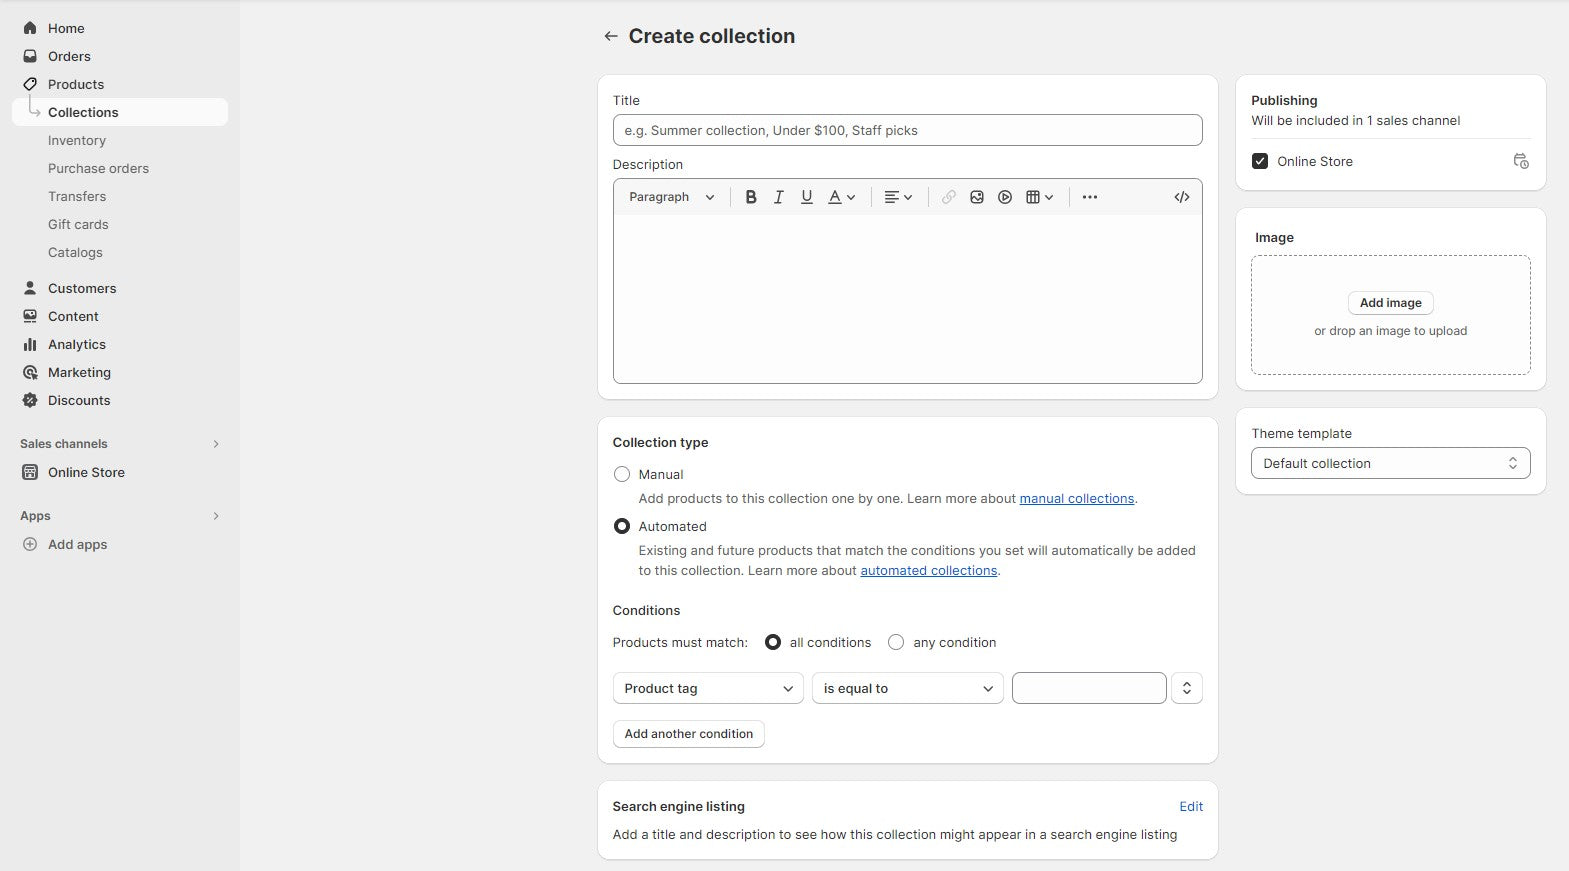
- Choose whether you want to create a manual or automated collection. If you choose manual, you can select which products you want to include in your collection. If you choose automated, you can set rules based on product title, type, tag, price, inventory, vendor, or weight.
- Click on the "Save" button to create your collection.
You can create as many collections as you want for your store. You can also edit or delete them at any time.
7: Set Up Payments And Shipping
The next step is to set up payments and shipping for your store. Payments are how you accept money from customers when they buy from you. Shipping is how you deliver products to customers when they order from you.
To set up payments for your store, follow these steps:
- Go to the "Settings" section in your Shopify dashboard and click on the "Payments" tab.
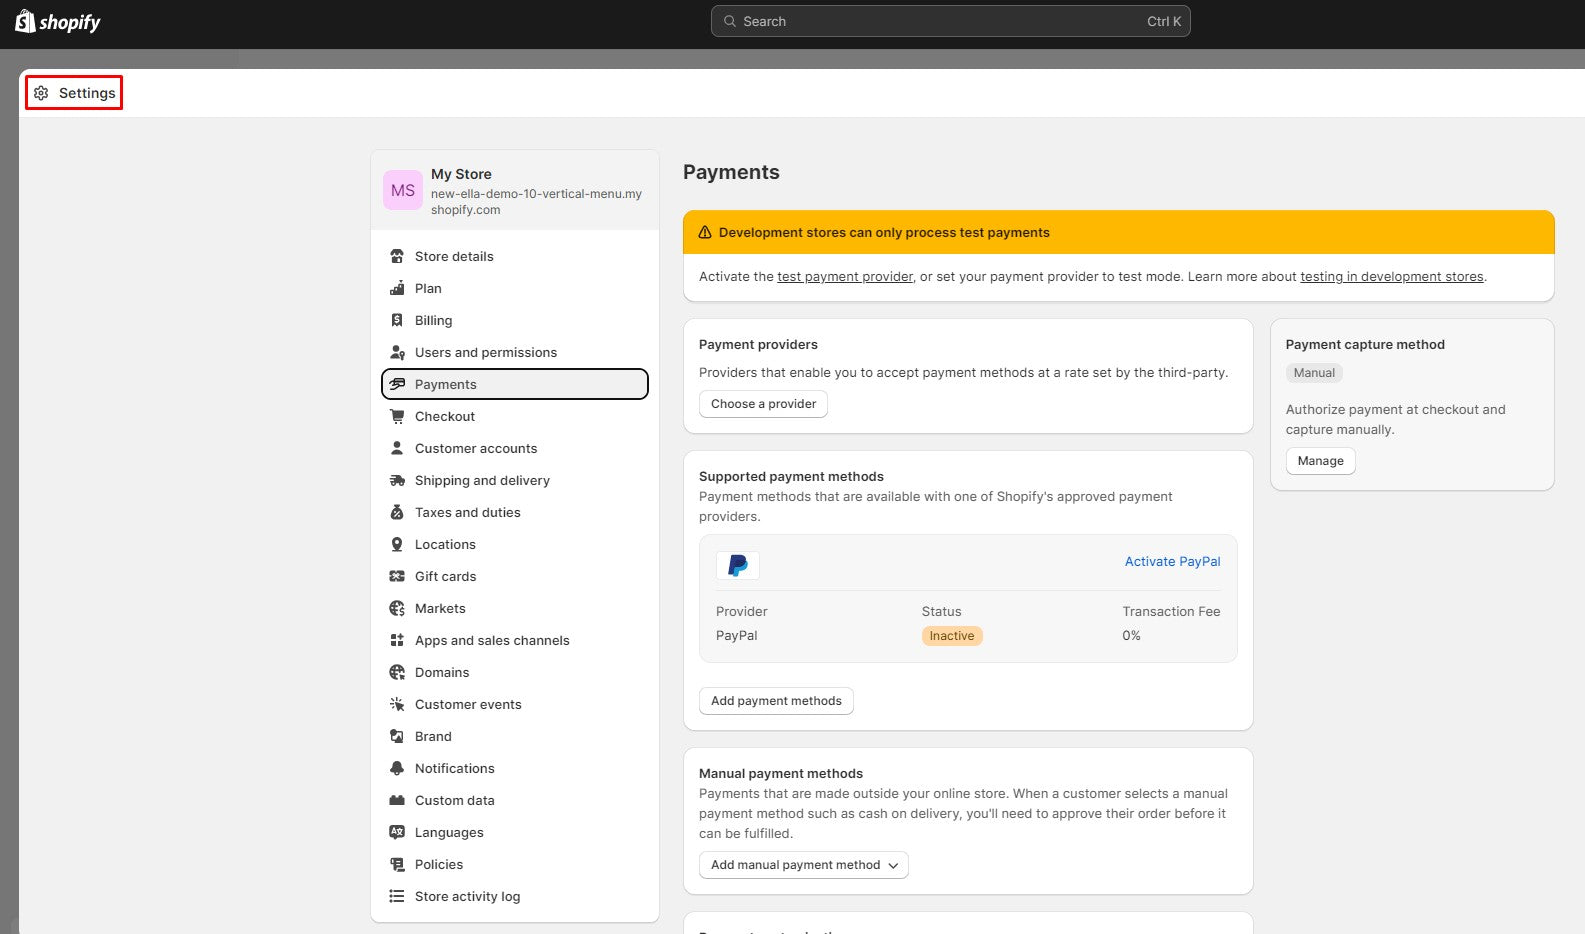
- Choose which payment methods you want to accept on your store. You can use Shopify Payments, which is Shopify's own payment gateway that supports credit cards, debit cards, PayPal, Shop Pay, Apple Pay, Google Pay, and more. You can also use third-party payment gateways that support other payment methods such as Stripe, Square, Amazon Pay, etc.
- Enter your bank account details where you want
8: Optimize for SEO
Search Engine Optimization (SEO) is crucial for ensuring that your Shopify store is easily discoverable by potential customers. By optimizing your online store for search engines, you can improve your visibility in search results, attract more organic traffic, and ultimately increase sales. Here's a comprehensive guide to SEO for your Shopify store:
Keyword Research:
Start by conducting keyword research to identify the terms and phrases your potential customers are searching for. Use tools like Google Keyword Planner and SEMrush to find relevant keywords in your niche.
On-Page Optimization:
- Optimize your product pages, category pages, and blog posts by incorporating relevant keywords into titles, meta descriptions, and content.
- Use descriptive and unique product titles and meta descriptions.
- Ensure that your URLs are clean and include relevant keywords.
- Optimize your images by using descriptive alt tags.
High-Quality Content:
Create high-quality and informative content. Regularly update your blog with articles that address your customers' questions and concerns.
Use internal linking to connect related content within your store.
Mobile-Friendly Design:
Ensure your Shopify store is mobile-responsive. A mobile-friendly design is crucial for SEO as search engines prioritize mobile-optimized websites.
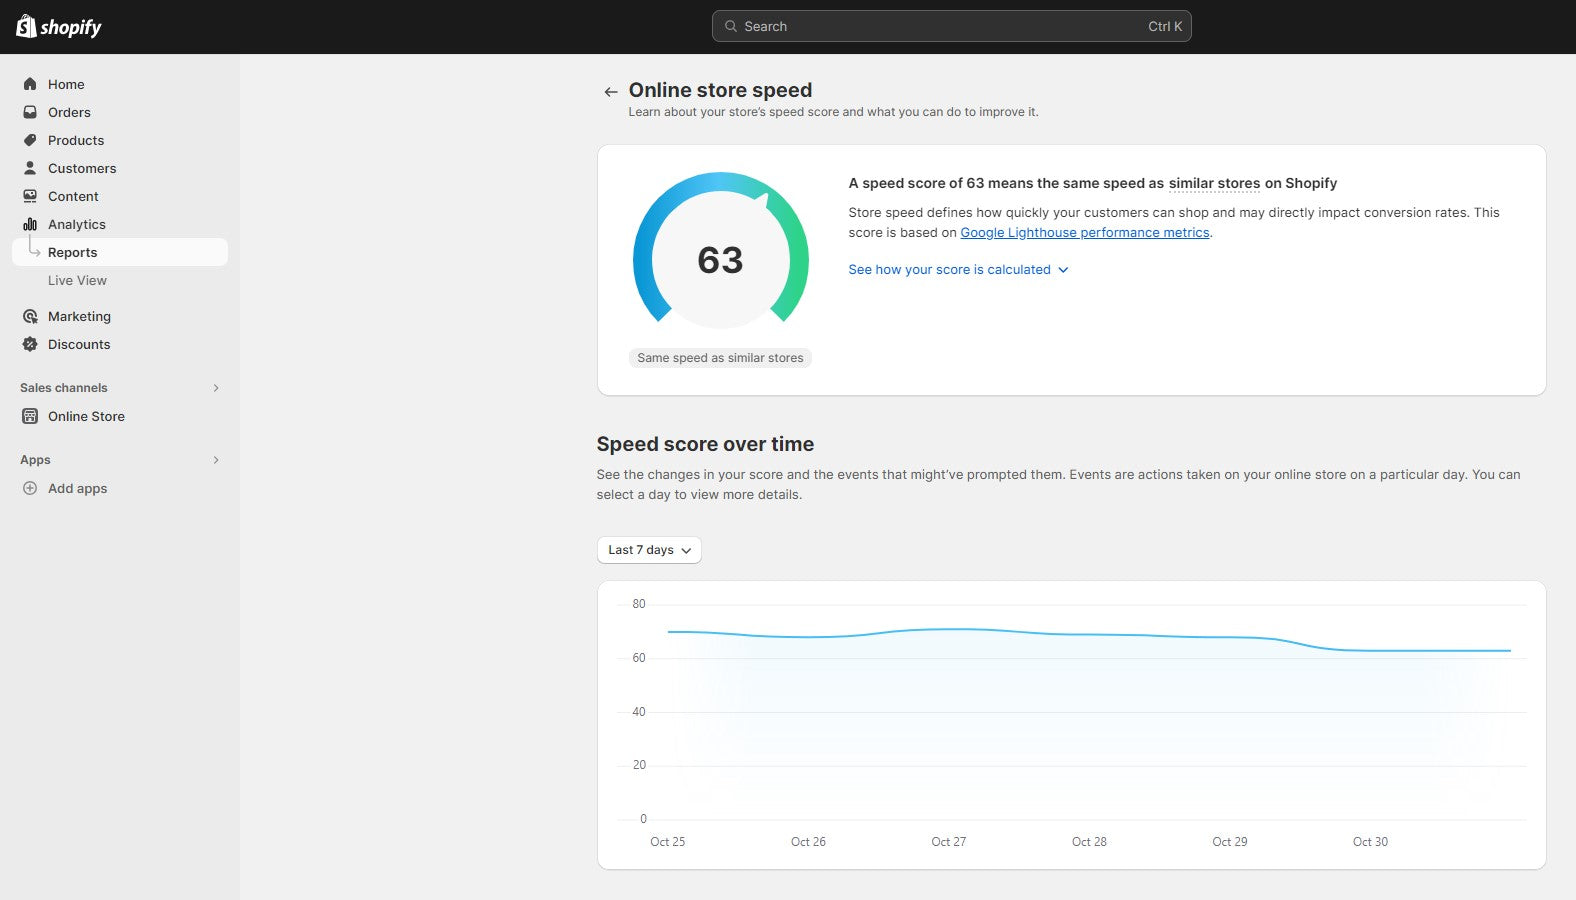
Page Speed:
Improve your store's page loading speed. Slow-loading websites can negatively impact SEO and user experience.
Compress images and enable browser caching to speed up your site.
User Experience (UX):
Provide a user-friendly experience by organizing your navigation, creating easy-to-use menus, and optimizing the checkout process.
Minimize the number of clicks required for customers to find products.
Technical SEO:
Regularly check for broken links and fix them.
Create a sitemap and submit it to search engines for easy indexing.
Optimize your website's structure and improve its crawlability.
Reviews and Testimonials:
Encourage customers to leave reviews and testimonials on your product pages. Positive reviews can improve your store's trustworthiness and SEO rankings.
Secure Website (SSL):
Ensure your website is secure by using an SSL certificate. Secure sites are preferred by search engines.
Social Media Integration:
Integrate your social media profiles with your Shopify store. Social signals can indirectly influence your SEO rankings.
Local SEO (If Applicable):
If you have a physical store, optimize for local SEO. List your store in local directories and use location-based keywords.
Backlinks:
Build high-quality backlinks from reputable websites. Guest posting, partnerships, and content marketing can help you acquire valuable backlinks.
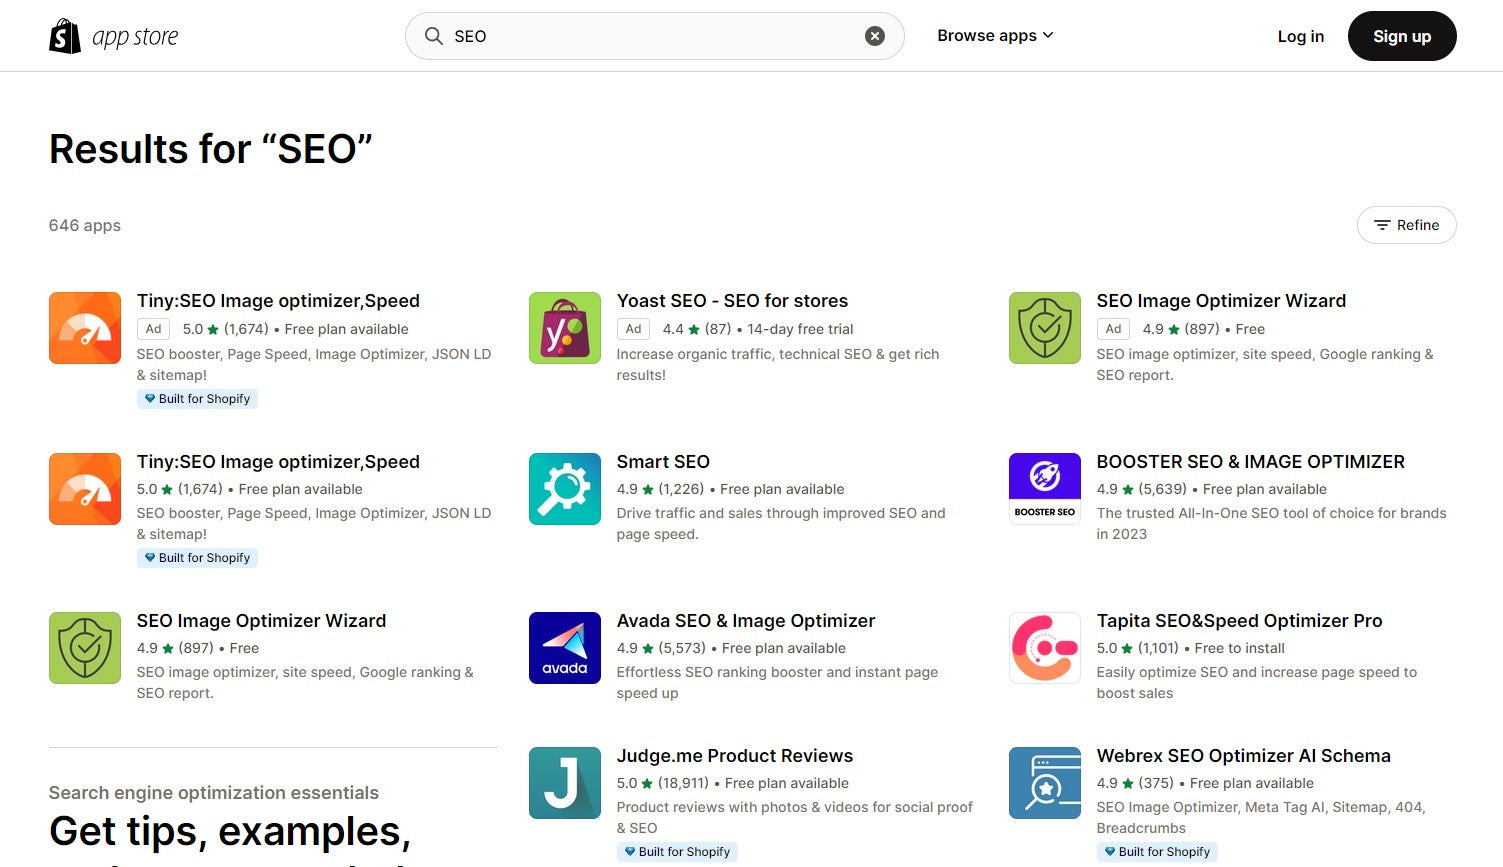
Shopify SEO Apps:
Consider using SEO apps available in the Shopify App Store. These can provide additional features and insights for SEO optimization.
Regular Monitoring and Adjustments:
Continuously monitor your SEO efforts, track your rankings, and adjust your strategy as needed.
By implementing these SEO practices, your Shopify store can improve its search engine rankings, drive more organic traffic, and ultimately increase your online sales. SEO is an ongoing process, so make it a part of your long-term strategy for e-commerce success.
9: Launch Your Store
Before launching, thoroughly test your website for functionality, including browsing, purchasing, and payment processing. Once you're confident in the functionality of your site, it's time to go live. Announce your store's launch through various marketing channels, including social media and email.
10: Market Your Store
Marketing is an ongoing effort to drive traffic and sales to your online store. Utilize various marketing strategies, including social media marketing, content marketing, email marketing, and paid advertising. Building a social media presence, connecting with influencers, and offering promotions can help you attract and retain customers.
11: Analyze and Optimize
Regularly analyze your store's performance using Shopify's built-in analytics and other tools. Pay attention to key metrics such as conversion rates, traffic sources, and customer behavior. Use this data to identify areas for improvement and continually optimize your online store.
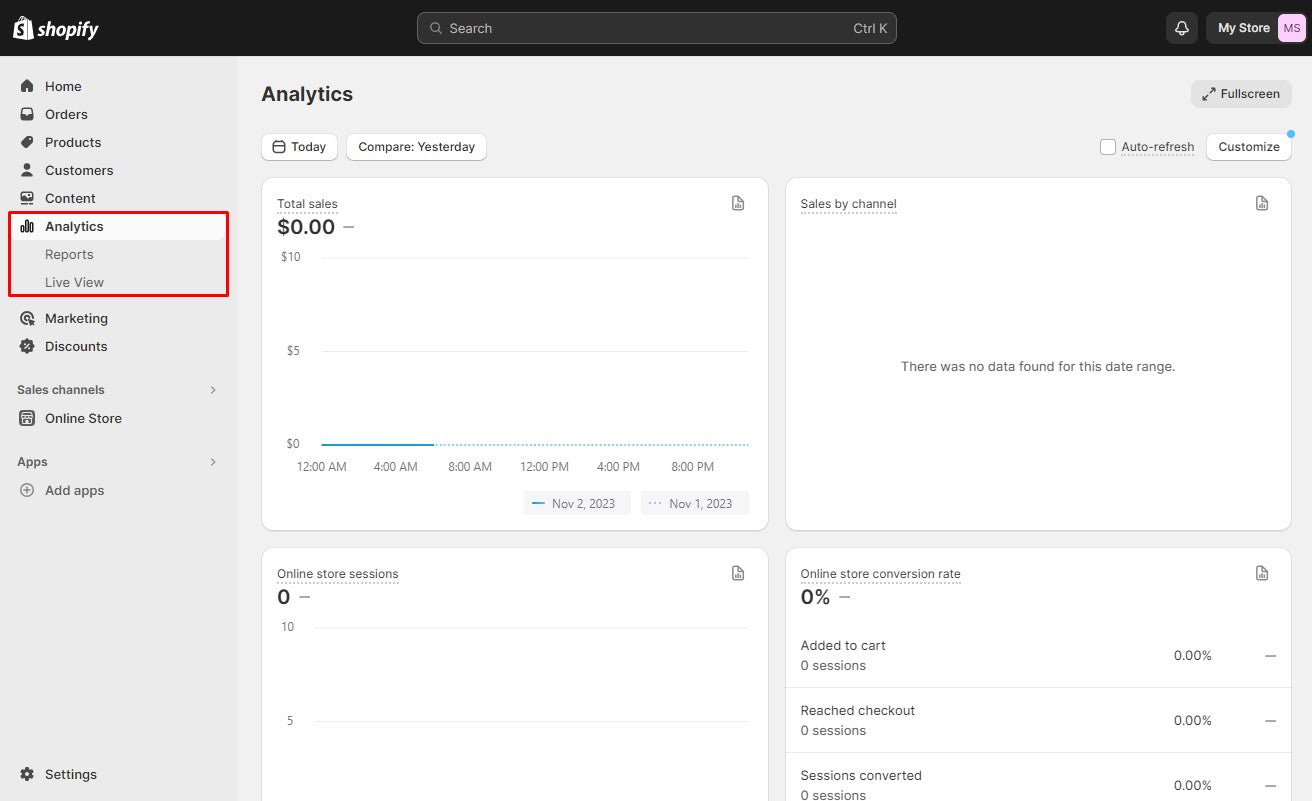
Shopify Reports, located within the Analytics > Reports section, not only allows you to track the traffic and sales generated by your store across all your sales channels but also provides a wealth of valuable insights for enhancing your business in the long run.
With this tool, you can gain insights into the sources of your traffic and sales, your store's overall conversion rate, and the trends in your traffic and sales over time, among other valuable metrics.
To access more detailed analytics and enjoy flexible reporting, consider Setting up Google Analytics 4, which is available for free.
Conclusion:
Starting a Shopify online store in 2023 is an exciting and rewarding endeavor. By following this step-by-step guide, you can set the foundation for a successful online business. Remember that the e-commerce landscape is constantly evolving, so stay updated with the latest trends and technology to remain competitive in the digital marketplace. With determination, dedication, and the right strategies, your Shopify store can thrive in the ever-expanding world of online retail.


